Détection de segments dans une image
C’est une technique assez vieille et qui consiste à détecter des segments comme des anomalies : l’alignement de points est un événement assez rare dans un nuage de points mais rare comment ? Cette idée mène à la probabilisation d’une image pour quantifier ce qu’est un alignement de points nécessairement rare.
Une image aléatoire
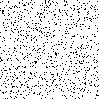
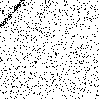
On considère un bruit aléatoire uniforme dans une image et on ajoute des points aléatoires tirés le long d’une ligne selon une loi gaussienne : uniforme sur la ligne, gaussien autour du segment.
[17]:
from mlstatpy.image.detection_segment import random_noise_image, convert_array2PIL

img = random_noise_image((100, 100))
convert_array2PIL(img, mode="binary")
[17]:
[18]:
from mlstatpy.image.detection_segment import random_segment_image

random_segment_image(img, density=3.0, lmin=0.3)
[18]:
{'size': 43,
 'angle': 0.45754951975081887,
 'x1': 8,
 'y1': 43,
 'x2': 46.576920763478554,
 'y2': 61.995293743669706,
 'nbpoints': 129}
[19]:
convert_array2PIL(img, mode="binary")
[19]:
[20]:
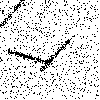
random_segment_image(img, density=5.0, lmin=0.3)
random_segment_image(img, density=5.0, lmin=0.3)
convert_array2PIL(img, mode="binary")
[20]:
[21]:
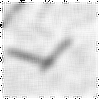
pilimg = convert_array2PIL(img, mode="binary").convert("RGB")
pilimg
[21]:

[22]:
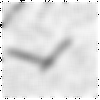
from PIL import ImageFilter


pilimg = (
    pilimg.filter(ImageFilter.BLUR)
    .filter(ImageFilter.BLUR)
    .filter(ImageFilter.BLUR)
    .filter(ImageFilter.BLUR)
)
pilimg
[22]:
[23]:
from PIL import ImageEnhance

enh = ImageEnhance.Sharpness(pilimg)
final_img = enh.enhance(4)
final_img
[23]:
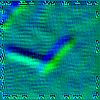
Gradient
La détection des segments est basée sur le gradient.
[24]:
from mlstatpy.image.detection_segment import compute_gradient, plot_gradient

grad = compute_gradient(final_img, color=0)
[25]:
plot_gradient(pilimg.copy(), grad, direction=-2)
[25]:
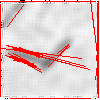
Détection de segments
[26]:
from mlstatpy.image.detection_segment import detect_segments

seg = detect_segments(final_img, verbose=1, seuil_nfa=1e-1)
len(seg)
n =  1000  ...  81  temps  0.21  sec nalign 277
n =  2000  ...  152  temps  0.34  sec nalign 640
n =  3000  ...  180  temps  0.49  sec nalign 917
n =  4000  ...  290  temps  0.62  sec nalign 1312
n =  5000  ...  315  temps  0.81  sec nalign 1535
n =  6000  ...  330  temps  0.98  sec nalign 1859
n =  7000  ...  426  temps  1.14  sec nalign 2093
n =  8000  ...  457  temps  1.29  sec nalign 2425
n =  9000  ...  604  temps  1.53  sec nalign 2756
[26]:
605
[27]:
from mlstatpy.image.detection_segment import plot_segments

plot_segments(final_img.copy(), seg)
[27]:
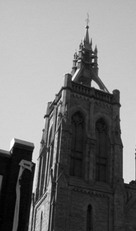
Détection de segments sur une image
[28]:
from PIL import Image

egl = Image.open("eglise_zoom2.jpg")
egl
[28]:
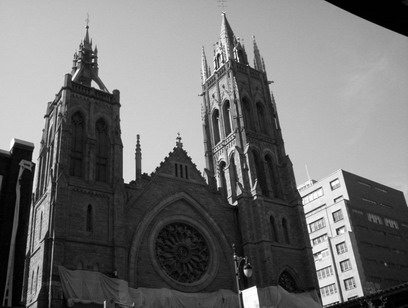
On réduit la taille de l’image.
[29]:
egl2 = egl.crop((0, 0, egl.size[0] // 3, 3 * egl.size[1] // 4))
egl2
[29]:
[30]:
grad2 = compute_gradient(egl2, color=0)
plot_gradient(egl2.copy(), grad2, direction=-2)
[30]:

[31]:
seg2 = detect_segments(egl2)
len(seg2)
[31]:
490
[32]:
from mlstatpy.image.detection_segment import plot_segments

res = plot_segments(egl2.copy(), seg2)
res
[32]:
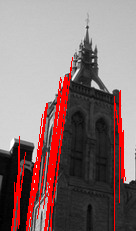
Il faudrait fusionner les segments mais cela a l’air de marcher.